Step 1. Remove the handle from the handle rests and place the handle in the full position as shown.
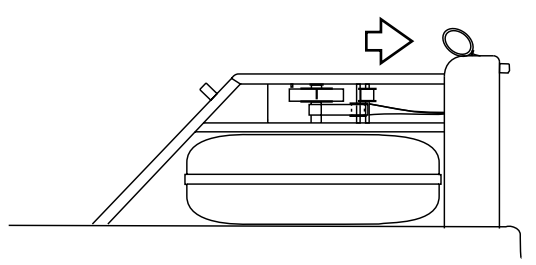
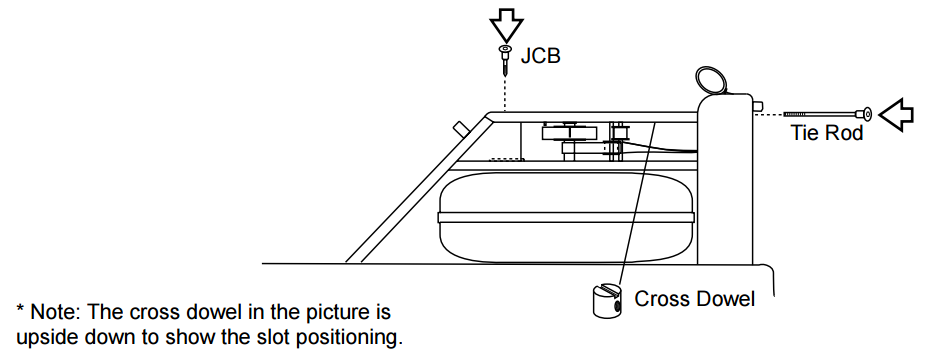
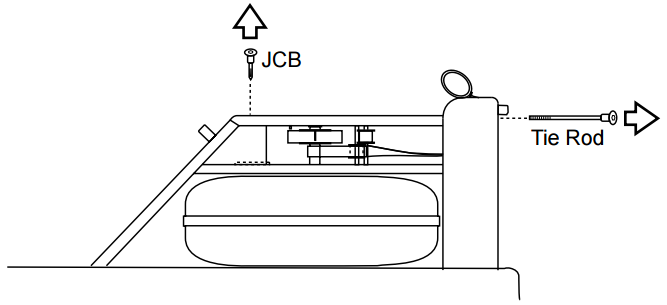
Step 2. Remove the top 2 tie rods and JCB bolts connecting the top deck to the tank assembly as shown.
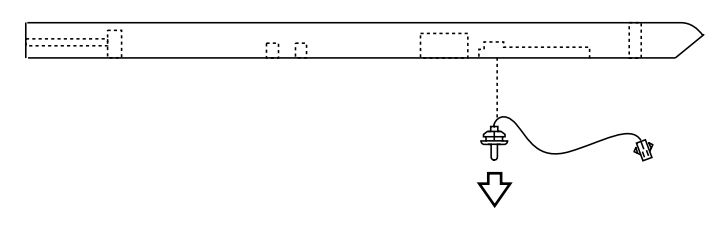
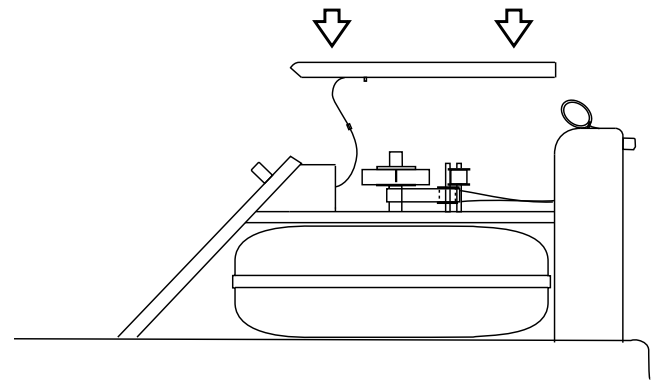
Step 3. Remove the top deck assembly as shown, being careful not to dislodge the guide pulleys. Unclip the sensor wire from the monitor wire.

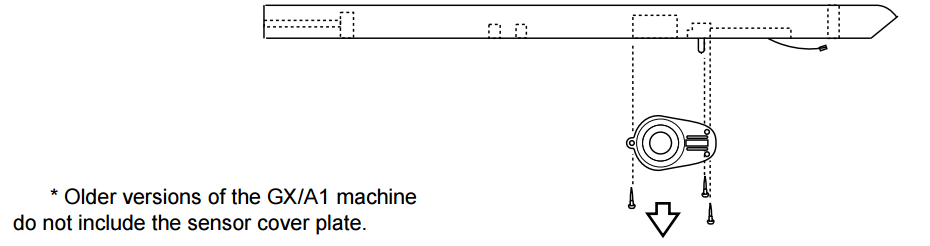
Step 4. Remove the three screws holding the sensor cover plate* to the bottom of the top deck. Remove the staple holding the sensor wire to the top deck.
Step 5. To remove the sensor, simply pull it out. It’s a snug fit, but doesn’t require much effort to take out.
Step 6. Replace the old sensor by pressing the new one into place. You can use a piece of tape to hold the wire to the top deck. Replace the sensor cover plate and screws.

Step 7. Reconnect the sensor and monitor wires, then gently fit the top deck back into place.
Step 8. Replace the JCB bolts and 2 tie rods connecting to the top deck to the tank assembly as shown. Ensure that the tie rod cross dowel slots are aligned with the tie rod. You can use a flat screwdriver to hold the cross dowel in place when aligning.