Monitor Series 3 Service Instructions

Series 3: Monitor Fascia Replacement

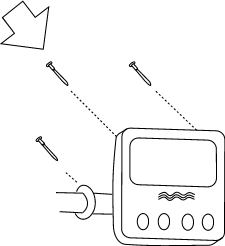
Step 1.  Remove screws (4) fastening the monitor facia to the monitor backplate as shown.
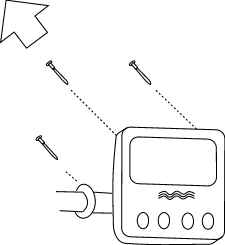
Step 2. Remove the Facia Assembly as shown.
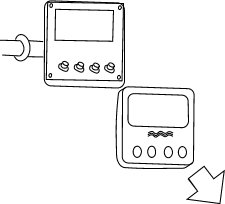


Step 3.  Replace facia assembly as shown.
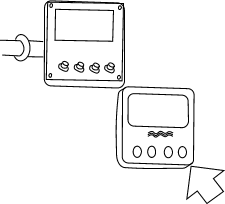
Step 4. Replace screws (4) fastening the monitor facia to the monitor backplate as shown.
Related Articles

  • Series 3: Recoil Bushing Replacement

    Handle Removal Step 1- Remove the handle from the Handle rests and place the Handle in the full forward position.   Step 2- Stand the WaterRower upright and disconnect the...

  • A1/GX: Handle Replacement (metal clutch)

    For Video Instructions, click here: Replacing the Handle Assembly (Metal/Velcro attachment) Step 1- Remove the Handle from the handle rests and place the handle in the full forward position.  ...

  • Series 3: Oilite Bearing Replacement

    Step 1- Remove the Handle from the handle rests and place the handle in the full forward position. Step 2- Stand the WaterRower upright and disconnect the bungee from the...

  • Series 3: Level Gauge Location

    The Level Gauge sticker on all Series 4 (S4) model WaterRower units, is located on the side of the tank under the tank stopper.   The Level Gauge sticker on...