Series 4 Service Instructions

Series 4: Cover Plate Replacement (push-button)

Step 1– Press the Heel Rest adjustment button and remove the Heel Rests as shown.

Step 2– Using the 5mm Allen Key provided with the machine, remove the Heel Rest Adjustment Button as shown.

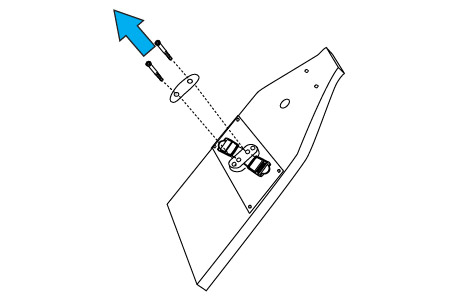
Step 3– Using the 5mm Allen Key, remove the Foot Strap as shown.

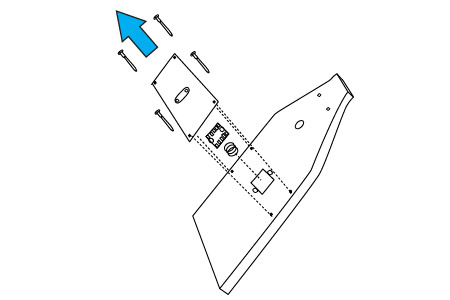
Step 4– Using a Phillips Head Screwdriver (not supplied), remove the Cover Plate as shown.

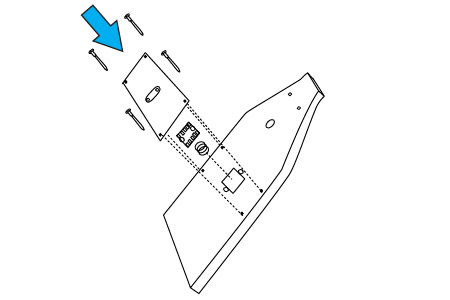
Step 5– Using a Phillips Head Screwdriver (not supplied), replace the Cover Plate as shown.

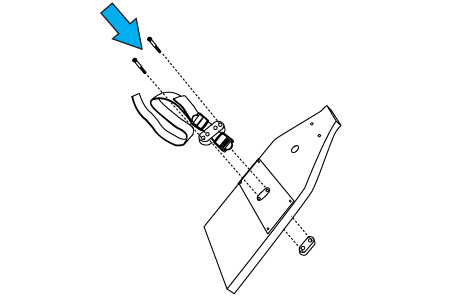
Step 6– Using the 5mm Allen Key provided with the machine, replace the Foot Strap as shown.

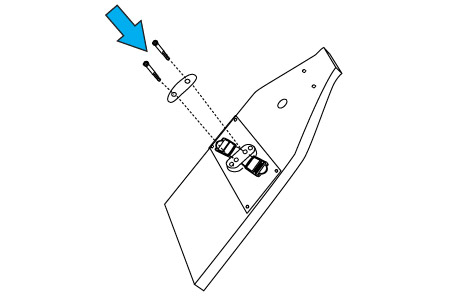
Step 7– Using the 5mm Allen Key provided with the machine, replace the Heel Rest Adjustment Button as shown.

Step 8– Press the Heel Rest adjustment button and replace the Heel Rests as shown.

Related Articles

  • A1/GX: Recoil Bushing Replacement

    Handle Removal Step 1- Remove the handle from the Handle rests and place the Handle in the full forward position.   Step 2- Stand the WaterRower upright and disconnect the...

  • A1/GX: Foot Strap Replacement

    Replacing the foot strap on the A1/GX WaterRower is very simple; in order to replace the strap, you will need a pair of scissors and a Phillips screw driver. To...

  • Series 3: Monitor Upgrade

    Step 1- Remove the handle from the handle rests and place the handle in the full forward position as shown.  Step 2- Stand the WaterRower upright and disconnect the bungee...

  • Series 4: Tank Reseal with Glue Kit

    If your tank has sprung a leak, the best way to go about repairing it is with our Tank Glue Kit. We have full written instructions as well as a...