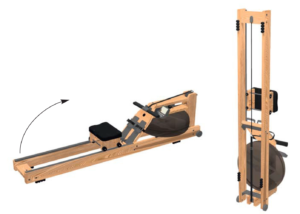
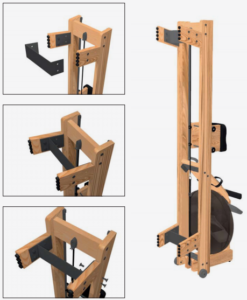
Step 1 – Stand the WaterRower upright.
Step 2 – Using a Phillip’s head screwdriver, remove all 16 Rail Bumpers and Rail Bumper screws from underneath the rails.
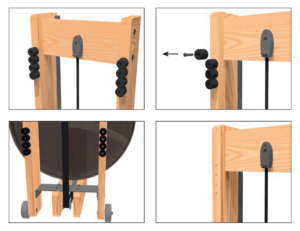
Step 3 – Attach the Down Brackets (x4) with the provided screws (B110) – 4 screws on each bracket. These go into the holes left when the screws and Rail Bumpers were removed. You may need to pre drill the 4 holes to make inserting the provided screws easier.
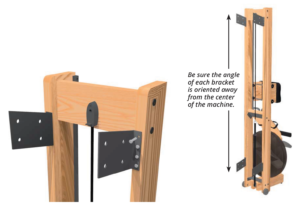
Step 4 – Using 2 JCNs and 2 JCBs for each leg, attach each of the Wooden Legs to the metal Down Brackets. Ensure the angle of each wooden leg matches the angle of the bracket. Connect the wooden leg to the bracket using the 2 lower-most holes in the leg and bracket. Do not tighten these bolts all the way.
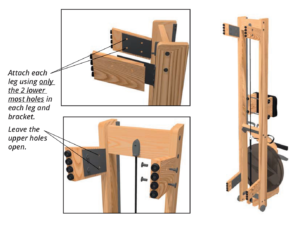
Step 5 – Once all 4 wooden legs are in position, attach the 2 Cross Brackets (one above and one below). Use the remaining JCN and JCB sets and attach the brackets to the upper holes on each leg. Once everything is in place, go back and tighten all of the bolts from Step 4.
Related Articles

Series 3: Seat Replacement
Step 1- Loosen the fasteners holding the Rear Spacer to the rails three or four turns each. Step 2- Remove the seat. Step 3- Replace the seat. Step...
Series 3: Monitor Upgrade
Step 1- Remove the handle from the handle rests and place the handle in the full forward position as shown. Step 2- Stand the WaterRower upright and disconnect the bungee...
S1: Single Bungee Replacement
For Video Instructions, please see the following link: Replacing the S4 Bungee Assembly Step 1- Remove the Handle from the handle rests and place the handle in the full forward...