Monitor Series 4 Service Instructions

Series 4: Monitor Board Replacement

Step 1- Remove screws (2) fastening the battery cover at the rear of the monitor as shown.
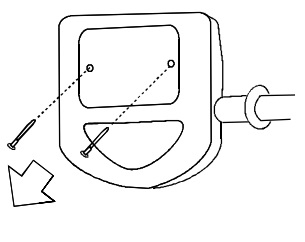
Step 2– Remove the Battery Cover as shown.
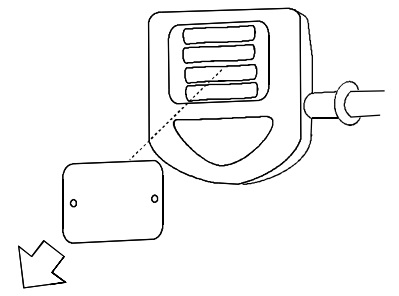
Step 3- Remove the Battery as shown
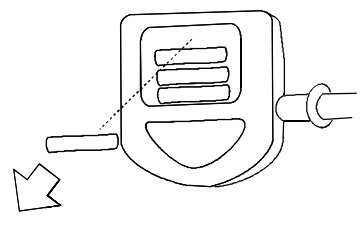
Step 4- Remove screws (4) fastening the Monitor Board Assembly to the housing as shown.
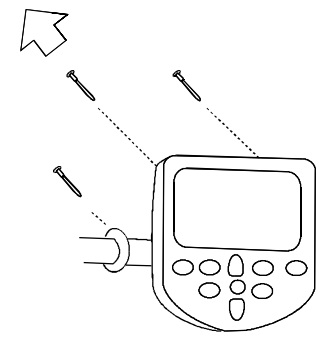
 

Step 5- Remove Monitor Board Assembly as shown.
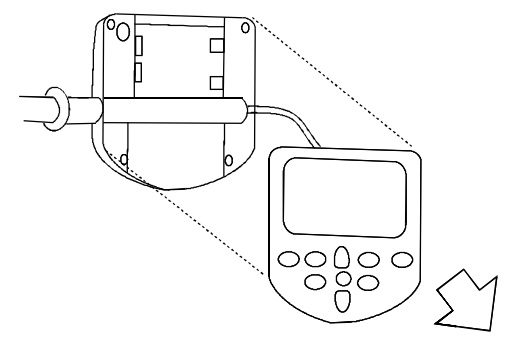
 

Step 6- Remove the Sensor Wiring Connector as shown.
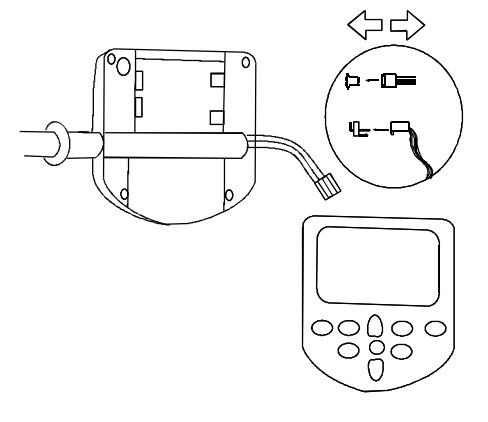
Step 7- Replace Monitor Board as shown. Be care to ensure that yoyu place the Sensor Wiring Connector correctly. The connector should be oriented so that the red wire is toward the outside edge of the board.
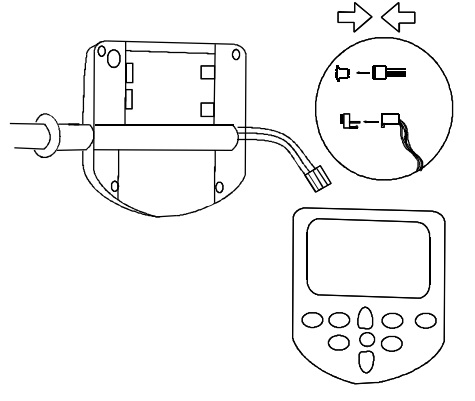
Step 8- Replace Monitor Board assembly as shown.
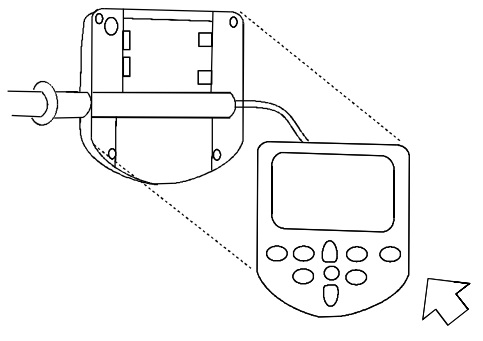
 

Step 9- Replace screws (4) fastening the Monitor Board Assembly to the Monitor Housing as shown.
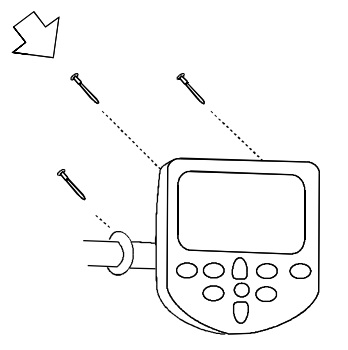
Step 10- Replace Batteries as shown.
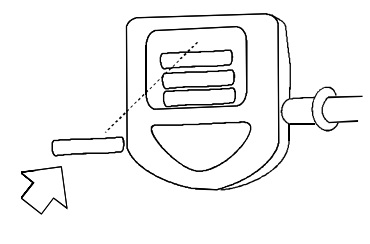
 

Step 11- Replace the Battery Cover as shown.
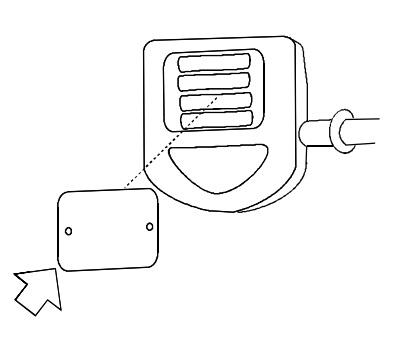
 

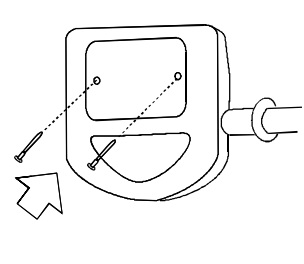
Step 12– Replace the screws (2) fastening the battery cover at the rear of the monitor as shown.
Related Articles

  • M1: Footstrap Replacement

    You will need a 5mm allen wrench and a 13mm wrench. Step 1.  Remove old strap. Step 2.  Use the 5mm allen key and 13mm wrench to remove clamp and...

  • Series 4: Heel Rest Replacement (Push-Button)

    Step 1– Press Heel Rest Lock Button and remove Heel Rest/Footpads. You may need to use a card (credit card, etc.) to help remove the heel rests fully. Slide the...

  • A1/GX: Rail Bumper Replacement

    These rail bumpers help support bottom of the A1/GX Rear Leg. Used on; A1/GX Series Only. To order this part, head to our website: WRPR201 – A1/GX Leg Bumper Set

  • M1: Bungee Replacement

    Step 1- Remove the handle from the handle rests and place the handle in the full forward position. Step 2- Disconnect the bungee as shown. Step 3- Remove the bungee...