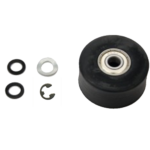
- Position the handle forward to the front Forward Riser pulley
- Carefully remove the Top Deck by removing the Top Deck bolts and upper Tie Rods. Gently lift the Top Deck up being careful not to dislodge any of the guide pulleys. Unclip the sensor connector from the wire harness.
- Remove the footboard handle rests, and loosen the rail and footboard JCN & JCB nuts and bolts so the footboard can swing away from the tank unit.
- Using the 5mm Allen key, remove the left key bracket. The left side being as you are sitting on the seat of the WaterRower. Also, the left key bracket is the bracket that does not house the S4 monitor. Set the key bracket and bolts aside.
- Using a small Phillips screwdriver, remove the S4 Monitor batteries and battery cover.
- Using a small Phillips screwdriver, remove the 4 small screws and S4 Monitor board from the backplate housing.
- Un-plug the S4 Monitor wire harness from the back of the monitor board, pull the faulty wire harness through the spigot tube and discard the faulty wire harness.
- Feed the replacement wire harness through the spigot tube and clip into the S4 Monitor board. The smaller white connector end of the wire harness fits into the S4 Monitor board.
- Reposition the S4 Monitor board to the backplate by screwing in the 4 small screws.
- Replace the batteries and battery cover
- Replace the left key bracket.
- Reposition the footboard and reattach handle rests, keep handle rests loose.
- Plug wire harness connector into the sensor connector and replace the top deck. Replace the upper Tie Rods and Top Deck bolts.
- Tighten the handle rest bolts.
- Reposition the handle into the handle rests and the WaterRower is ready for use.
Related Articles
M1: Monitor Settings Calories Burned
m1 monitor calories burned
M1: Short Tank Assembly Replacement
1. Remove the handle from the handle rests and place in the full forward position. 2. Stand the WaterRower upright and disconnect the bungee. 3. Lay the WaterRower down and pull...

Series 3: Tacho Belt Replacement
Step 1 – Remove the Handle from the handle rests and place the handle in the full forward position as shown. Step 2 – Stand the WaterRower upright and disconnect the bungee...