Knowledge Base Archives: Series 3

Monitor Series 3 Service Instructions

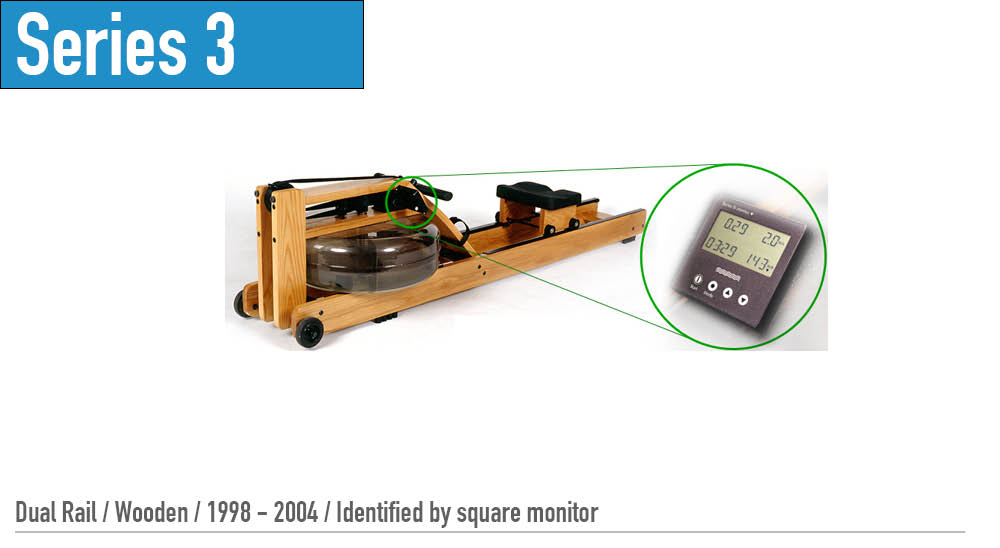
Series 3: Monitor Fascia Replacement

Step 1.  Remove screws (4) fastening the monitor facia to the monitor backplate as shown. Step 2. Remove the Facia Assembly as shown.     Step 3.  Replace facia assembly as shown. Step 4. Replace screws (4) fastening the monitor facia to the monitor backplate as shown.

Monitor Series 3 Service Instructions

Series 3: Monitor Board Replacement

Step 1.  Remove screws (4) fastening the monitor facia to the monitor backplate as shown. Step 2. Remove the Facia Assembly as shown. Step 3.  Remove monitor circuit board as shown. Step 4.  Replace monitor circuit board as shown. Be careful to ensure that you place the socket on the correct header (i.e. five pin …

Monitor Series 3 Service Instructions

Series 3: Monitor Retrofit

Step 1- Remove the handle from the handle rests and place the handle in the full forward position as shown.  Step 2- Stand the WaterRower upright and disconnect the bungee as shown.   Step 3- Lay the WaterRower down. Remove the Tie Rods and JCB Bolts connecting the Top Deck to the Tank assembly as …

Monitor Series 3 Service Instructions

Series 3: Monitor Upgrade

Step 1- Remove the handle from the handle rests and place the handle in the full forward position as shown.  Step 2- Stand the WaterRower upright and disconnect the bungee as shown.   Step 3- Lay the WaterRower down. Remove the Tie Rods and JCB Bolts connecting the Top Deck to the Tank assembly as …

Series 3 Service Instructions

Series 3: Seat Replacement

Step 1- Loosen the fasteners holding the Rear Spacer to the rails three or four turns each.   Step 2- Remove the seat.   Step 3- Replace the seat. Step 4- Tighten the fasteners holding the Rear Spacer to the rails.    

Series 3 Service Instructions

Series 3: Rubber Feet Replacement

Step 1- Locate the two sets of indentation guides on the bottom of the wooden rail. A:The rear rubber feet indentations are approximately 3 1/2” from the back of each rail. B:The front rubber feet indentations are approximately 13” from the front of each rail.   Step 2- Start at the rear of the rail …

Series 3 Service Instructions

Series 3: Footboard Upgrade

Step 1-Remove the Handle from the handle rests and place the handle in the full forward position.   Step 2– Remove the handle rest bolts and handle rests as shown. Step 3– Remove side bolts fixing the Foot Board to the side rails as shown. Step 4– Remove the Foot Board as shown. Step 5– …

Series 3 Service Instructions

Series 3: Footboard Replacement

Step 1-Remove the Handle from the handle rests and place the handle in the full forward position.   Step 2– Remove the handle rest bolts and handle rests as shown. Step 3– Remove side bolts fixing the Foot Board to the side rails as shown. Step 4– Remove the Foot Board as shown. Step 5– …